
Sauces & Condiments
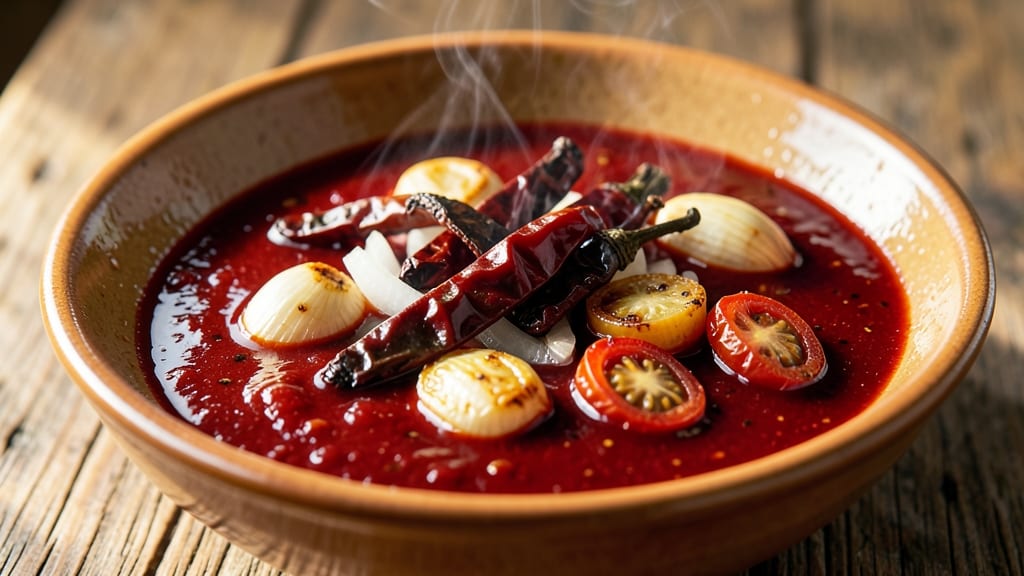
This authentic Mexican red sauce recipe delivers the smoky, complex depth of traditional salsa roja—without requiring specialty ingredients. The secret lies in balancing dried chiles, tomatoes, and garlic for a sauce that works as a dipping sauce, braising liquid, or topping for tacos and enchiladas.
I developed this version after years of testing, ensuring it captures the authentic flavor while using pantry staples like chipotle peppers and cumin.
The process is straightforward but precise: toast the chiles and spices to deepen their flavor, then simmer with tomatoes until the sauce thickens naturally. No blending required—just a fine-mesh strainer for that traditional, rustic texture.
The result is a rich, slightly smoky sauce with just the right balance of heat and acidity, perfect for adding to any Mexican dish or serving alongside grilled meats.
What sets this sauce apart is its versatility—use it as a marinade for chicken, a topping for nachos, or even a base for soups. The smoky chipotle depth comes through in every bite, while the bright tomato notes keep it fresh.
Once you taste this, store-bought versions won’t compare. Let’s get started on making yours.
This recipe yields about 3 cups of sauce, enough to coat a large batch of enchiladas or fill a dip bowl for a crowd. Store it in the fridge for up to 2 weeks or freeze for longer shelf life.
The longer it sits, the better the flavors meld—trust the process. Ready to elevate your Mexican cooking? Here’s how.
Ingredients for authentic mexican red sauce
Pantry staples meet authentic Mexican flavor in this smoky red sauce. No specialty items needed.
| Ingredient | Amount | Notes |
|---|---|---|
| Dried Chipotle Peppers in Adobo 🌶️ | 2 whole | From canned adobo sauce |
| Dried Ancho Chiles 🌶️ | 3 whole | Stemmed and seeded |
| Dried Guajillo Chiles 🌶️ | 3 whole | Stemmed and seeded |
| Garlic Cloves 🧄 | 6 cloves | Peeled, unminced |
| Medium White Onion 🧅 | 1 whole | Quartered, skin on |
| Roma Tomatoes 🍅 | 1 lb | Fresh or canned, peeled |
| Ground Cumin 🌿 | 1 tbsp | Toasted for depth |
| Ground Coriander 🌿 | 1 tsp | Freshly ground preferred |
| Extra-Virgin Olive Oil 🫒 | ¼ cup | For toasting spices |
| Apple Cider Vinegar 🍋 | 1 tbsp | Brightens flavor |
| Sea Salt 🧂 | 1 tsp | Adjust to taste |
The chiles are the heart of this sauce—dried ancho and guajillo bring sweetness and depth, while chipotle in adobo delivers that signature smoky punch. Mexican grocery stores carry these in bulk, but most Latin markets or well-stocked supermarkets stock them too. Look for vibrant, unblemished chiles—dull or discolored ones lose flavor fast. The adobo sauce from the canned chipotles? Save it for another use or freeze it. Toasting the chiles and spices in olive oil is non-negotiable—it deepens their flavor exponentially. Use a dry skillet and keep an eye on them; they burn fast.
No chipotle peppers? Substitute smoked paprika at half the amount, though you’ll lose that authentic depth. Swap Roma tomatoes for fire-roasted canned tomatoes—no peeling required. The vinegar can be swapped for lime juice, but apple cider vinegar’s tang pairs perfectly. Running low on coriander? Cumin alone works**, but the blend is what makes this sauce sing. For a smoother texture, strain through a fine-mesh sieve; for rustic texture, let the chiles blend naturally. The sauce thickens as it cooks, but if it’s too thin, simmer uncovered to reduce.
This sauce tastes even better the next day as flavors meld. Store in an airtight container in the fridge for up to 2 weeks—the longer it sits, the deeper the flavor. Freeze for 6 months by portioning into ice cube trays for easy use. Label containers with the date; freshness matters. Double the batch if you plan to freeze—it’s worth it. The sauce keeps its vibrant color and smoky notes when reheated gently, making it perfect for batch cooking. Use it as a marinade, dipping sauce, or enchilada dipper—just trust the process.
Why You'll Love This Recipe
- No Pantry Panic: I only need dried chiles and a blender—no fancy gadgets or last-minute grocery runs. Those ancho and guajillo peppers soak while I chop one onion and a few garlic cloves, then blend everything into oblivion. Honestly, the hardest part is deciding how spicy to make it.
- Smoky Depth Bomb: That chipotle in adobo? It’s the secret weapon—smoky, fruity, and just a little funky. When I toast the dried peppers first, the aroma alone makes me pause mid-chop. The sauce finishes with a balance of heat and sweetness that lingers like a good memory.
- Weeknight Magic: Slap this on tacos, drizzle it over eggs, or toss it with rice—it’s the sauce that does it all. I keep a jar in the fridge for lazy mornings or impromptu dinner guests. Between us, it’s the reason my freezer’s always stocked with burrito leftovers.
- Budget Stretch: A few dried peppers and a bulb of garlic go a long way. I make a big batch, freeze half, and still have enough for next month’s chipotle chicken or black beans. No wasted ingredients, just pure flavor that keeps giving. (Yes, even on a Tuesday night.)
Step-by-step instructions for authentic Mexican red sauce
This method delivers smoky, complex flavor using traditional techniques and pantry staples.
Prepare and Toast the Dried Chiles
Begin by removing stems and seeds from the dried ancho chiles and guajillo chiles. Place them in a dry skillet over medium heat and toast for about 2 minutes per side until they darken slightly and release their aroma. The chiles should smell fragrant but not burn—this step deepens their natural sweetness and removes any bitterness.
Transfer the toasted chiles to a bowl and cover with hot water from the kettle. Let them soak for 15 minutes to soften completely. While they soak, carefully remove the dried chipotle peppers from their adobo sauce using a slotted spoon. Rinse them under cold water to remove excess sauce, then add them to the same bowl of hot water. This prepares them for blending while keeping their smoky essence intact.
Char the Onion and Tomatoes
Heat a separate skillet over medium-high heat and add the quartered white onion with skin on. Cook for 8-10 minutes, stirring occasionally, until the edges blacken and the onion becomes tender. Remove from heat and let cool slightly—this charring adds depth to the sauce.
While the onion chars, place the 1 lb roma tomatoes directly on the gas burner (or under a broiler) and char them until their skins blacken all over. This step is crucial for authentic flavor—it concentrates their sweetness and removes skins easily. Place the charred tomatoes in a bowl of ice water for 2 minutes to stop the cooking process, then peel off the skins using your fingers or a knife.
Blend All Ingredients for Smooth Sauce
Drain the soaked chiles and chipotle peppers, reserving 1 cup of the soaking liquid. In a blender, combine the drained chiles, charred onion, peeled tomatoes, 6 cloves garlic, 1 tbsp ground cumin, 1 tsp ground coriander, and 1 tbsp apple cider vinegar. Start blending on low speed, then increase to high until completely smooth, scraping down the sides as needed.
With the blender running, slowly drizzle in the 0.25 cup extra-virgin olive oil through the feed tube. This emulsifies the sauce and creates a velvety texture. Add the reserved soaking liquid 1 tablespoon at a time until you reach a pourable consistency—you should have about 2-3 cups of sauce total. Taste and adjust seasoning with sea salt as needed.
Simmer and Reduce for Concentrated Flavor
Transfer the blended sauce to a medium saucepan and bring to a gentle simmer over medium-low heat. Stir frequently for 15-20 minutes until the sauce thickens slightly and coats the back of a spoon. The sauce should reduce enough to cling to the sides of the pan when stirred—this concentration intensifies the smoky, spicy flavors.
Real talk: Don't rush this step. The slow simmer allows the flavors to meld and develop that authentic depth. If the sauce becomes too thick, add 1-2 tablespoons of water to loosen it. Once properly reduced, remove from heat and let it cool slightly before serving. The sauce will continue to thicken as it cools, so aim for a consistency that's smooth but still pourable.
Pro Tips For Making Authentic Mexican Red Sauce
- Toast Chiles Low and Slow: Skip the blistering high heat—simmer your guajillo and ancho chiles in 1 cup water for 10 minutes on medium-low before blending. I used to rush this, and the sauce always tasted bitter and harsh. Low heat softens the fibers and lets the natural sweetness bloom without burning the edges.
- Seed and Stem Chipotles: Remove stems and seeds from the chipotles in adobo before adding them to the sauce—even if you’re using them whole. The seeds pack heat, and the stems add bitterness. I learned this after making a batch that tasted like smoky campfire ash.
- Char Onion Until Black: Blacken the onion halves directly over the flame (cut-side down) until the edges curl and crisp. This adds depth the stove-top method misses—just watch like a hawk or you’ll burn them faster than you can say "comida quemada." (Yes, even if you’re impatient like me.)
- Blend With Warm Liquid: Add the toasted chiles, garlic, and onion to the blender with the warm soaking liquid, not cold. Cold liquid makes the sauce grainy and separates the oils. I skip this step sometimes, and the texture suffers—trust me, the blender handles it better when everything’s hot.
Essential equipment for this recipe
Skillet for Toasting
Start with a 10-inch cast-iron skillet—it retains heat evenly and prevents burning while toasting your chiles and onions. I use my Lodge Pre-Seasoned Cast Iron because it develops a natural nonstick surface over time.
For a lighter option, a stainless steel skillet works too, but watch the heat more closely to avoid scorching. Preheat the skillet over medium heat for 2 minutes before adding ingredients to ensure even toasting. 🔥
Blender for Smoothness
A high-power blender is essential for achieving that velvety texture—look for at least 1,000 watts of power. My go-to is the Ninja BN601 because it handles tough ingredients like charred tomatoes and dried chiles without overheating.
If you're blending larger batches, consider a food processor with a metal blade, but a blender gives you more control over consistency. Always blend in short bursts to prevent motor overload.
Fine-Mesh Strainer
For a traditional, rustic texture, skip blending entirely and use a fine-mesh stainless steel strainer to press the soaked chiles and charred ingredients. The OXO Good Grips strainer is my favorite—its durable mesh ensures no gritty bits remain.
If you prefer a smoother sauce, strain after blending to remove any remaining seeds or skins. This step is optional but worth it for that authentic, chunk-free finish. 💫
Saucepan for Simmering
Use a heavy-bottomed saucepan with a 3-quart capacity to simmer your sauce evenly. My All-Clad Stainless Steel pan prevents scorching and distributes heat perfectly. Avoid thin, lightweight pans—they create hot spots that can burn your sauce.
Keep the heat at medium-low and stir frequently to prevent sticking. A wooden spoon is ideal for stirring without scratching the pan.
Immersion Blender (Optional)
If you prefer not to transfer hot liquids, an immersion blender like the Cuisinart Stick lets you blend directly in the pot. This is a game-changer for sauces—no transferring, no mess. Just submerge the blender head and pulse until smooth.
It’s especially useful if you’re making the sauce in a Dutch oven, which is perfect for slow simmering. The immersion method also helps preserve more of the sauce’s natural oils and flavors. 💡
Measuring Tools
Precision matters when balancing heat and acidity. Use a digital kitchen scale for spices like cumin and coriander—1 tbsp ground cumin should weigh about 12 grams, not heaping spoons. For liquids, a liquid measuring cup with markings ensures you add the right amount of vinegar or olive oil.
I also keep a small ladle handy for tasting and adjusting seasonings as you go. Small tools make a big difference in flavor control.
Nutrition facts
Frequently asked questions
Can I make this sauce without fresh tomatoes?
Use 1 (28 oz) can of fire-roasted tomatoes instead of fresh. No need to peel or char them—just drain and add directly to the blender. The canned version adds natural sweetness and saves time while keeping the authentic flavor.
How do I adjust the heat level?
Remove the seeds and membranes from the dried chiles before toasting for milder heat. For extra spice, add 1 extra chipotle pepper or a pinch of cayenne. Always taste as you go—you can't remove heat, but you can balance it with more tomatoes or vinegar.
What's the best way to store leftover sauce?
Transfer to an airtight container and refrigerate for up to 2 weeks. For longer storage, freeze in ice cube trays—thaw overnight in the fridge before using. The flavors actually improve after 24 hours of resting in the fridge.
Can I use this sauce as a marinade?
Yes! This sauce makes an excellent marinade for chicken or pork. Combine 1 cup of sauce with 1 cup of yogurt and marinate for 4-6 hours. The smoky depth enhances grilled meats beautifully. Just don't over-marinate—8 hours max to prevent mushy texture.
Why does my sauce look thin after blending?
Don't worry—the sauce will thicken as it simmers. If it's still too thin after 20 minutes of reducing, simmer uncovered to evaporate excess liquid. For immediate thickening, mix 1 tsp cornstarch with 1 tbsp water and stir in at the end. The texture should coat the back of a spoon when cool.