
Sauces & Condiments
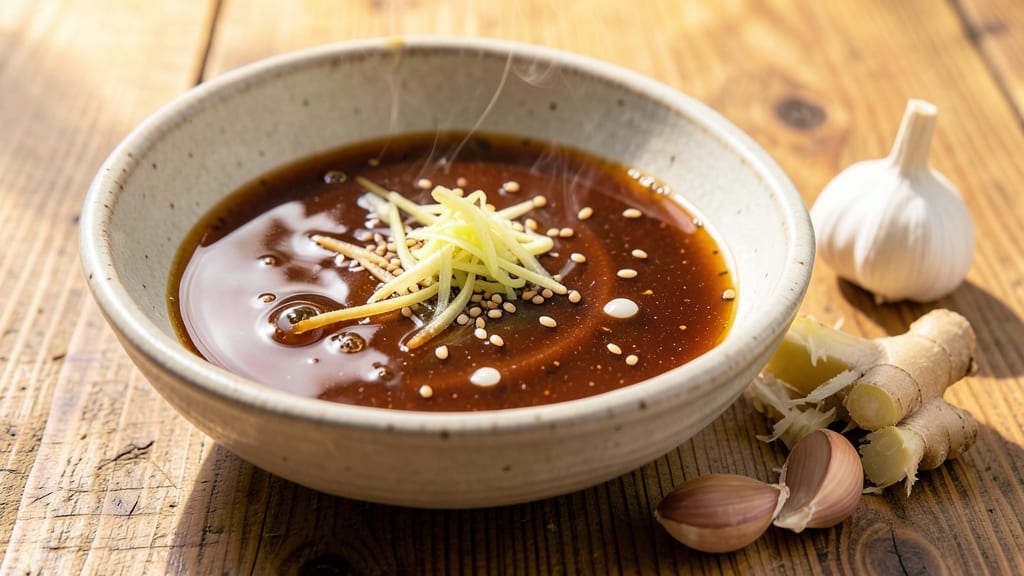
This copycat teriyaki sauce delivers the same bold, caramelized depth you’d find in Japanese restaurants—glossy, slightly sweet, and packed with umami. The secret lies in balancing soy sauce, mirin, and sugar while simmering until it thickens into a velvety consistency.
I’ve tested countless versions, and this one consistently replicates that restaurant-quality shine.
What sets this sauce apart is the two-stage simmering process, where sugar caramelizes for a deeper flavor before blending with the tangy soy and bright mirin.
No artificial additives—just authentic ingredients that transform simple proteins into showstopping dishes. The result? A sauce so rich, it clings to every bite like your favorite takeout.
Perfect for glazing meats, drizzling over rice, or dipping fresh veggies, this teriyaki sauce keeps beautifully in the fridge for up to 2 weeks—or freeze it for months. The instructions break down each step precisely, ensuring you achieve that signature glossy finish without guesswork.
Once you taste the difference, store-bought versions won’t compare. Let’s make teriyaki that rivals your go-to restaurant—starting with the sauce itself.
Ingredients for copycat teriyaki sauce
Nine essential ingredients transform into restaurant-quality teriyaki sauce with just two stages of simmering.
| Ingredient | Amount | Notes |
|---|---|---|
| Kosher Soy Sauce 🍶 | ½ cup | High-quality, low-sodium preferred |
| Mirin 🍶 | ¼ cup | Sweet rice wine, not mirin substitute |
| Granulated White Sugar 🍚 | ½ cup | Pure cane sugar for caramelization |
| Fresh Ginger Root 🌿 | 2 tbsp | Finely grated, aromatic peel included |
| Garlic Cloves 🧄 | 4 cloves | Minced, for aromatic depth |
| Rice Vinegar 🍶 | 2 tbsp | Seasoned rice vinegar for balance |
| Sesame Oil 🫒 | 1 tbsp | Toasted sesame oil for aroma |
| Cornstarch 🌾 | 1 tbsp | For thickening consistency |
| Water 💧 | ½ cup | Room temperature for blending |
| Diamond Crystal Kosher Salt 🧂 | ½ tsp | Fine grain for seasoning |
Mirin is the secret weapon here—look for authentic Japanese mirin at Asian markets or specialty stores like H Mart or 99 Ranch Market. The real stuff has just 14% alcohol and a delicate sweetness that substitutes can't replicate. For soy sauce, Kikkoman or La Choy are solid choices, but if you're using reduced-sodium, add an extra pinch of salt at the end. Fresh ginger loses potency fast, so grab it at the store the same day you cook. The peel-on variety is easiest to grate without peeling first. Garlic should be plump and firm—no sprouts or green shoots. Toast your sesame oil in a dry pan for 30 seconds before adding to deepen its aroma, but don't let it smoke.
No mirin? Equal parts white wine and sugar works in a pinch, though the sauce will be slightly less refined. Substitute rice vinegar with apple cider vinegar, but reduce to 1.5 tbsp since it's more acidic. For the sugar, brown sugar or honey adds molasses notes that might alter the balance—stick with white if you want that classic teriyaki brightness. If you're avoiding cornstarch, arrowroot powder at half the amount works just as well. The cornstarch needs to be dissolved in cold water first—whisk vigorously to avoid clumps. For a gluten-free version, swap soy sauce for tamari or coconut aminos, though the flavor will differ slightly.
This sauce thickens as it cools, so reheat gently if it seems too stiff. Store in an airtight container in the fridge for up to 2 weeks, or freeze for 6 months in ice cube trays for single-use portions. The flavor actually improves after a day or two as the ingredients meld. For extra shine, add a dash of sesame oil before serving. The sauce doubles as a marinade—just reduce the salt by half if using it for that purpose.
Why You'll Love This Recipe
- Five-Ingredient Magic: I swear by this combo—soy, mirin, sugar, ginger, and garlic—because it’s the real deal. No weird additives, just bold umami that cuts through anything you toss it on.
- Pantry Staple Power: Honestly, I keep these ingredients stocked just for this. The mirin adds that glossy sweetness without extra effort, and the ginger? Just a quick grate while the sauce simmers.
- Weeknight Glaze Game: Slather it on chicken thighs before baking, drizzle over stir-fried veggies, or even toss with tofu for a meal that’s ready in 20 minutes. (Yes, even on a Tuesday night.)
- Leftovers That Last: This sauce thickens beautifully when refrigerated—perfect for batching. I make a double batch every Sunday and use it all week, from takeout-style bowls to quick marinades.
Step-by-step instructions for copycat teriyaki sauce recipe
This is the method that delivers that signature umami-rich, slightly sweet, glossy teriyaki you crave from Japanese restaurants.
Bloom the Aromatics in Toasted Sesame Oil
Heat the 1 tablespoon sesame oil in a medium saucepan over medium-low heat. Add the 2 tablespoons finely grated fresh ginger root and 4 minced garlic cloves, stirring constantly for 2-3 minutes until the ginger becomes fragrant and the garlic turns golden without browning. This step builds the aromatic foundation—don't rush it, or you'll burn the delicate garlic before it releases its full flavor.
Watch the color carefully—you want the garlic to be pale golden, not dark brown. If it starts to darken too quickly, reduce the heat slightly. The sesame oil should shimmer but not smoke. This is where the sauce gets its authentic depth, so take your time here.
Caramelize the Sugar for Depth of Flavor
Add the 0.5 cup granulated white sugar all at once and stir vigorously to dissolve completely. Increase the heat to medium-high and cook for 5-7 minutes, stirring constantly, until the mixture turns a deep amber color. You're looking for a rich caramelization that will form the sauce's sweet-savory backbone.
This is the moment that matters: the sugar should coat the back of a spoon and develop a syrupy consistency without burning. If it crystallizes or looks grainy, add 1 teaspoon water and stir until smooth. The caramelized sugar gives teriyaki its signature glossy finish and complex flavor profile.
Build the Sauce Base with Soy and Mirin
Reduce the heat to medium and pour in the 0.5 cup kosher soy sauce and 0.25 cup mirin. Stir well to combine, then add the 2 tablespoons rice vinegar and 0.5 teaspoon diamond crystal kosher salt. Bring the mixture to a gentle simmer, then reduce heat to low and let it cook uncovered for 10-12 minutes, stirring occasionally, until the liquid reduces by about one-third and thickens slightly.
You'll notice the sauce darkening and developing a glossy sheen—this is when the flavors meld together. The mirin adds sweetness and depth, while the rice vinegar provides that signature tang. If the sauce starts to stick to the pan, add 1 tablespoon water to prevent burning while maintaining the proper consistency.
Thicken and Finish with Cornstarch Slurry
In a small bowl, whisk together the 1 tablespoon cornstarch with the 0.5 cup water until smooth. Slowly pour this slurry into the simmering sauce while stirring constantly with a wooden spoon. The sauce will thicken dramatically within 1-2 minutes—keep stirring to prevent lumps from forming.
Continue cooking for another 2-3 minutes until the sauce reaches a glossy, coatable consistency. It should be thick enough to cling to the back of a spoon but still flow smoothly. Taste and adjust seasoning—add a pinch more kosher salt if needed, or a splash more mirin for sweetness. The sauce should balance sweet, salty, and umami perfectly.
Rest and Adjust for Perfect Texture
Remove the sauce from heat and let it rest for 5-10 minutes at room temperature. This resting period allows the flavors to fully meld and the sauce to reach its ideal consistency. If it's too thick after resting, thin it with 1-2 teaspoons water at a time until it reaches your desired pouring consistency.
The sauce should now have that signature glossy sheen and perfect balance of sweetness, saltiness, and umami. This is your copycat teriyaki—ready to drizzle over grilled meats, stir-fries, or even as a dipping sauce. Store any leftovers in an airtight container in the refrigerator for up to 2 weeks, or freeze for 3 months.
Pro Tips For Making Copycat Teriyaki Sauce
- Simmer Low and Slow: If you rush this sauce, you’ll end up with a thin, bitter mess. Keep the heat at a gentle simmer—just enough to see tiny bubbles breaking the surface, not a rolling boil. I learned this the hard way when I burned the garlic and turned my sauce into soy-flavored syrup.
- Peel and Mince Ginger Like a Pro: Skip the pre-peeled ginger from the jar—it’s waterlogged and flavorless. Use a spoon to scrape off the skin, then finely mince it (about 1/4 cup) so it dissolves smoothly. If you’re lazy, a microplane works, but your sauce will taste noticeably better with fresh, finely textured ginger.
- Balance Sugar Gradually: Don’t dump all the sugar at once—add half first and taste. The sauce needs sweetness, but too much upfront can make it cloying. If it’s too sharp, a pinch more sugar later fixes it; if it’s too sweet, you’re stuck. (Yes, I’ve done both.)
- Strain for Smoothness: After simmering, strain the sauce through a fine-mesh sieve to remove ginger and garlic bits. This isn’t just for looks—it keeps every bite silky, not gritty. I skip this step sometimes, and the texture suffers. (Your future self will notice.)
Make-ahead tips for this dish
Fridge Storage Secrets
Transfer your teriyaki sauce to a glass airtight container—I prefer Pyrex with a snap-on lid—and let it cool completely before refrigerating. The sauce thickens as it chills, so I recommend storing it at room temperature for no more than 2 hours before refrigerating at 40°F or below.
This sauce keeps beautifully for 2 weeks, with flavors actually deepening over time as the ingredients meld together. 💡
Freezer Prep for Long-Term Use
For extended storage, divide the sauce into ice cube trays—this makes it perfect for single-use portions when thawed. Once frozen solid, transfer the cubes to a freezer-safe bag and flatten to save space.
The sauce maintains quality for 3-6 months in the freezer, though I notice the texture becomes slightly thinner after thawing. To restore consistency, simmer the thawed sauce for 3-5 minutes on the stovetop. ❄️
Thawing Without Losing Quality
Thaw teriyaki sauce overnight in the fridge for the best results, or use the microwave defrost setting for quick access. If you're in a hurry, place the frozen container in a bowl of warm water—this gentle method prevents temperature shock that can alter the sauce's texture.
Once thawed, give it a quick stir and adjust the consistency with 1-2 teaspoons water if needed. 🔥
Reviving Stored Sauce
If your refrigerated sauce has thickened too much, thin it with 1 teaspoon water at a time while stirring gently. For freezer-thawed sauce that's lost its gloss, return it to the stovetop and simmer for 2-3 minutes over low heat.
This reheating step also helps restore that signature sheen. I always taste and adjust seasoning after reheating—sometimes a pinch of kosher salt or dash of mirin brings it back to perfection. ✨
Batch Prep for Meal Planning
Double or triple the recipe when you're planning multiple meals—this sauce is incredibly versatile. Store individual portions in small glass jars for easy grab-and-go use. Label each container with the date to track freshness.
I often make a big batch on Sundays so I can quickly glaze proteins or toss with noodles all week long. The key is keeping it sealed tightly to prevent absorption of fridge odors. 📅
Restaurant-Quality Revival
For that extra restaurant-quality finish, add ½ teaspoon toasted sesame oil to freshly reheated sauce just before serving. This restores the aromatic depth that can sometimes fade during storage.
I also keep a small jar of extra mirin on hand to brighten up any batch that's lost its vibrancy over time. The secret to maintaining quality is proper storage and gentle reheating—never microwave directly from frozen. 💛
Nutrition facts
Frequently asked questions
Can I substitute mirin in this teriyaki sauce?
Yes, but the flavor will differ slightly. For every 1 tablespoon mirin needed, mix 1 tablespoon white wine with 1 tablespoon sugar. This mimics the sweetness and slight alcohol content, though authentic mirin adds a delicate floral note that substitutes can't fully replicate. Use this swap only if necessary—mirin is worth tracking down for the best results.
Why does my homemade teriyaki sauce look thin?
Sauce naturally thickens as it cools, but if it's still too runny after resting, you likely need more cornstarch. For every ½ cup sauce that's too thin, whisk 1 teaspoon cornstarch with 1 tablespoon water and simmer for 2-3 minutes until thickened. Avoid over-thickening—it should coat the back of a spoon but still pour smoothly.
Is this teriyaki sauce gluten-free?
Not traditionally, but you can adapt it easily! Replace the ½ cup soy sauce with ½ cup tamari (gluten-free soy sauce) or coconut aminos. Note that coconut aminos have a slightly different profile—expect a milder umami flavor. For extra depth, add ½ teaspoon gluten-free fish sauce to compensate for lost complexity.
Can I use this sauce as a marinade?
Reduce the ½ teaspoon salt by half to prevent over-salting tender proteins like fish or tofu. Marinate for 30-60 minutes for delicate items (like shrimp) or up to 4 hours for tougher cuts (like chicken thighs). For extra tenderness, add 1 teaspoon honey to the marinade. Always pat dry before cooking to ensure proper searing.
How do I fix burnt sugar at the bottom of my pan?
Don't panic! Remove the pan from heat and add 2 tablespoons water, then scrape gently with a wooden spoon. If stubborn bits remain, add 1 teaspoon vinegar and simmer for 1 minute to dissolve. For future batches, stir constantly during the caramelization stage—burnt sugar means the heat was too high or the sugar wasn't dissolved properly.