Sauces & Condiments
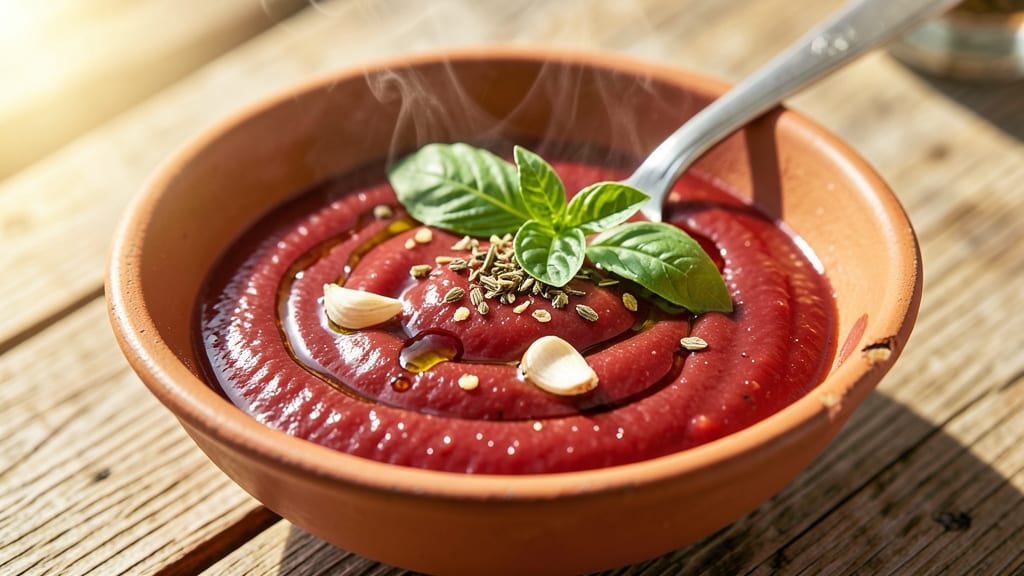
Rita's simple sauce recipe transforms basic pantry ingredients into a rich, versatile sauce that elevates everything from pasta to grilled meats. This recipe relies on a foolproof simmering technique that develops deep, complex flavors without requiring specialty ingredients—just a few staples and patience.
I developed it after years of testing sauces that promised depth but fell flat, and this one delivers every time.
The beauty of this sauce lies in its adaptability. A blend of tomatoes, garlic, and herbs simmers until the flavors meld into a smooth, velvety texture that clings perfectly to noodles, chicken, or roasted vegetables.
Unlike store-bought versions, this sauce builds flavor as it cooks, ensuring every bite tastes homemade. The process is straightforward—no fancy equipment or techniques—just a pot, a stove, and about 30 minutes of hands-off time.
What sets this sauce apart is its unexpected depth—a balance of acidity, sweetness, and umami that transforms simple meals into something restaurant-worthy. The garlic and herbs infuse the tomatoes, while a touch of sugar and vinegar brightens the final product.
It’s the kind of sauce that tastes even better the next day, as the flavors continue to develop in the fridge.
Use it as a pasta sauce, a marinade, or a drizzle over roasted dishes—this sauce is a versatile workhorse that belongs in your weekly rotation. Once you try it, you’ll wonder how you ever relied on anything else. Let’s get started!
Ingredients for rita's simple sauce
Pantry staples transform into restaurant-quality sauce with just ten ingredients and patience.
| Ingredient | Amount | Notes |
|---|---|---|
| Extra-Virgin Olive Oil 🫒 | ¼ cup | High-quality, fruity variety preferred |
| Canned Crushed Tomatoes 🍅 | 14 ½ oz | San Marzano preferred for sweetness |
| Garlic Cloves 🧄 | 4 cloves | Freshly minced for optimal flavor |
| Fresh Basil Leaves 🌿 | ½ cup | Packed, stems removed for intensity |
| Dried Oregano 🍃 | 1 tsp | Mexican oregano preferred if available |
| Red Wine Vinegar 🍷 | 1 tbsp | For acidity balance |
| Granulated Sugar 🍚 | 1 tsp | Balances acidity |
| Diamond Crystal Kosher Salt 🧂 | 1 tsp | Adjust to taste |
| Freshly Ground Black Pepper 🌶️ | ½ tsp | For subtle heat |
| Dry Red Wine 🍷 | ½ cup | Cabernet Sauvignon preferred |
The tomatoes form the sauce's foundation—San Marzano cans deliver the sweetest, most concentrated flavor, but any high-quality crushed tomatoes work. Whole Foods or Trader Joe's carry excellent options. Fresh basil should be vibrant green with no yellowing; stems removed maximize flavor. For the wine, Cabernet Sauvignon adds depth, but any dry red will suffice. The olive oil must be extra-virgin—substituting regular oil compromises the sauce's velvety texture. Garlic cloves should be fresh and pungent, not dried or pre-minced.
No red wine? Dry white wine or additional vinegar maintains acidity. Substitute dried basil at one-third the amount, but fresh is ideal. Balsamic vinegar can replace red wine vinegar in a pinch. For a meatier flavor, add 1/2 cup beef broth> to the simmer. The sugar balances acidity—reduce to 1/2 teaspoon if your tomatoes are particularly sweet. Diamond Crystal salt dissolves completely; other brands may leave graininess. Always taste before serving—adjust seasonings gradually.
This sauce develops best over time—flavors deepen for 24-48 hours in the refrigerator. Store in an airtight container with a thin layer of olive oil on top to preserve freshness. Freezes beautifully for up to 3 months in ice cube trays for portion control. For restaurant-quality results, simmer uncovered to reduce slightly—this intensifies flavors. The sauce thickens as it cools, so adjust consistency with a splash of water or broth if needed.
Why You'll Love This Recipe
- Same sauce, endless uses: toss it with pasta, drizzle over grilled chicken, or serve it as a dip. Even my picky teenager asks for it. Honestly, it’s my go-to when I don’t know what else to make.
- Five-Ingredient Magic: I swear by this—just oil, tomatoes, garlic, basil, and oregano. That’s it. No fancy prep, no last-minute grocery runs. The crushed tomatoes even save me from chopping.
- Garlic-Basil Bomb: Between us, the secret’s in that first sizzle of garlic in olive oil. The crushed tomatoes soak up the aroma while the fresh basil finishes it with bright, herby punch—like summer in a jar.
- Weeknight to Party: Same sauce, endless uses: toss it with pasta, drizzle over grilled chicken, or serve it as a dip. Even my picky teenager asks for it. Honestly, it’s my go-to when I don’t know what else to make.
Step-by-step instructions for rita's simple sauce
This sauce comes together effortlessly using just pantry staples and basic technique.
Sauté the Garlic in Olive Oil
Heat the 0.25 cup extra-virgin olive oil in a medium saucepan over medium-low heat. Add the 4 cloves minced garlic cloves and sauté for 1-2 minutes until fragrant but not browned. The garlic should release its aroma immediately—this is your cue it's ready. Watch carefully as garlic burns quickly and turns bitter.
Real talk: If the garlic starts to color, immediately remove the pan from heat and let it cool for 30 seconds. You can always add more fresh garlic later if needed, but burnt garlic ruins the sauce. The oil should be shimmering but not smoking at this stage—adjust heat if necessary.
Add Tomatoes, Wine, and Acid Components
Pour in the 14.5 oz canned crushed tomatoes and 0.5 cup dry red wine, scraping any browned bits from the bottom of the pan with a wooden spoon. Stir in the 1 tbsp red wine vinegar and 1 tsp granulated sugar, then bring the mixture to a gentle simmer over medium heat. The acidity from the vinegar and sugar will balance the tomatoes' natural tang while the wine adds depth.
Let the sauce simmer uncovered for 10 minutes, stirring occasionally. You'll notice the tomatoes break down and the mixture thickens slightly. This simmering time allows the alcohol to cook off safely while developing the sauce's foundational flavor. The sauce should reduce by about one-third by this point.
Season and Simmer to Perfection
Add the 1 tsp dried oregano, 1 tsp diamond crystal kosher salt, and 0.5 tsp freshly ground black pepper. Stir well to distribute the seasonings evenly. Continue simmering for another 10-12 minutes until the sauce has thickened to your desired consistency—it should coat the back of a spoon but still be pourable.
Here's the thing—this sauce improves as it cools. If it's too thick after simmering, you can thin it with a splash of water or pasta water later. Taste and adjust the seasoning now if needed, remembering that the basil will add freshness later. The sauce should be rich, slightly tangy, and well-balanced without any single flavor dominating.
Finish with Fresh Basil
Remove the pan from heat and stir in the 0.5 cup fresh basil leaves. Let the sauce sit for 5 minutes to allow the basil to infuse its bright flavor. The leaves will wilt completely—this is normal and indicates they've released their oils into the sauce. For best results, use a blender or immersion blender to purée the sauce until smooth if you prefer a velvety texture.
This final step transforms the sauce from good to exceptional. The basil's freshness cuts through the richness of the tomatoes and wine, creating that signature Italian restaurant quality. If you're serving immediately, strain out the basil stems for a cleaner presentation, but leave them in if you're making ahead—they'll soften further during storage.
Pro Tips For Making Rita'S Simple Sauce
- Sweat the Garlic: Slice those cloves thin—like paper cuts, not poker chips—and cook them low and slow in the olive oil until they’re golden, not brown. I learned this the hard way: burnt garlic tastes like regret, and you’ll be smelling it for days.
- Crush the Tomatoes: Drain the crushed tomatoes before adding them to the pot—unless you’re craving a watery sauce. A quick press with a wooden spoon or your fist (yes, really) removes excess liquid, so your sauce thickens faster and tastes richer. No strainer? A fine-mesh colander works, but I skip it when I’m lazy and just stir longer.
- Salt the Oil: Toss a pinch of salt into the olive oil with the garlic—it’s not just for flavor, it helps draw out moisture and makes the garlic cook more evenly. I was skeptical until I tried it: the sauce develops depth faster, and the basil stays fresher longer.
- Add Basil Late: Tear the fresh basil leaves right at the end and stir them in just until wilted—any longer, and you’re left with sad, mushy bits. If you’re using it for garnish, add it last and keep it whole for that restaurant-worthy look. (Your future self will thank you.)
Dietary considerations for this recipe
Gluten-Free Adaptation
This sauce is naturally gluten-free as written, but always double-check your ingredients for hidden sources. The San Marzano crushed tomatoes and dry red wine are typically gluten-free, but some brands may contain cross-contamination. I recommend Bertolli or Muir Glen tomato cans, which are certified gluten-free.
The red wine vinegar and olive oil are also safe choices, but avoid any seasoning blends that might contain gluten additives. 🌱
Vegetarian & Vegan Options
For a vegetarian version, simply follow the original recipe—no animal products are used. For vegan adaptation, ensure your red wine is vegan-certified (some use animal fining agents) and check that your olive oil isn't filtered with bone char.
I prefer Freixenet vegan wines for this purpose. The sauce remains rich and flavorful without any modifications to the core ingredients.
Low-Sodium Adjustments
If you're watching your sodium intake, reduce the 1 tsp Diamond Crystal kosher salt to just ½ tsp and boost flavor with an extra ½ tsp freshly ground black pepper or ¼ tsp red pepper flakes.
The red wine vinegar and garlic also add depth, so don't skimp on those. For extra umami without salt, add 1 tsp nutritional yeast during the final simmer—it mimics the savory depth of Parmesan.
Allergen-Friendly Swaps
For those with garlic allergies, substitute with 1 tbsp garlic-infused olive oil (available at specialty stores) or omit entirely and add an extra ½ tsp onion powder for depth.
If you're avoiding wine, replace the ½ cup dry red wine with ½ cup vegetable broth> plus 1 tbsp extra red wine vinegar. The acidity remains balanced while keeping the sauce rich. Always taste as you go—these swaps can alter the flavor profile slightly. ✨
Dairy-Free Considerations
This sauce is already dairy-free, but if you're using it with dairy-sensitive dishes, note that the fresh basil and olive oil are naturally free from dairy.
For extra richness when serving over pasta, consider adding cashew cream> (blend ¼ cup soaked cashews with 2 tbsp water) instead of traditional cream-based sauces. The sauce itself remains perfectly safe for lactose-intolerant diets.
Nut-Free & Safe Options
All ingredients in this recipe are naturally nut-free, but always verify labels on your tomatoes, wine, and olive oil for potential cross-contamination warnings. The fresh basil and oregano are also safe choices.
For added safety, I recommend purchasing your pantry staples from allergy-friendly brands like Annie's or Whole Foods, which have strict allergen protocols. 💪
Nutrition facts
Frequently asked questions
Can I make this sauce without wine?
The wine adds depth, but you can substitute ½ cup vegetable broth plus 1 extra tablespoon red wine vinegar for the same acidity and richness. The sauce will still develop great flavor, just with a slightly different profile. For a non-alcoholic version, use ½ cup apple cider instead.
How long will this sauce keep in the fridge?
Store in an airtight container with a thin layer of olive oil on top to preserve freshness. It stays delicious for 5-7 days in the fridge, with flavors actually improving as it rests. For longer storage, freeze in ice cube trays for up to 3 months—perfect for portion control!
What's the best way to use leftover sauce?
This versatile sauce works perfectly over pasta, grilled chicken, or roasted vegetables. For extra richness, simmer it with 1 tablespoon butter or drizzle with extra-virgin olive oil before serving. It also makes a fantastic marinade—just thin with a little water or broth.
Why does my sauce taste too acidic?
If the acidity is overpowering, balance it with ½ teaspoon more sugar or a pinch of baking soda (just a tiny amount!). The sugar will mellow the vinegar, while the baking soda neutralizes acidity. Taste as you go—you can always add more sugar, but baking soda should be used sparingly.
Can I make this sauce in a slow cooker?
Combine all ingredients in your slow cooker and cook on low for 3-4 hours or high for 2 hours. The long cook time enhances the flavors beautifully. Just stir occasionally and add fresh basil at the end. The texture will be slightly thicker than stovetop, but equally delicious.